
One of the cutest things you can make on your embroidery machine is a baby onesie. It is also the most nerve wracking!! Hooping a tiny piece of clothing and then having to turn it inside out and keep all the material out of the way while stitching is enough to make you want to pull your hair out. But I have good news! After years of practice and playing around with hooping, I have finally figured out a way to get perfect placement and stitch out designs without constantly holding the extra fabric out of the way. Today I’m going to show you how I hoop and embroider a baby onesie on a single needle machine like the Brother PE800.
Placement
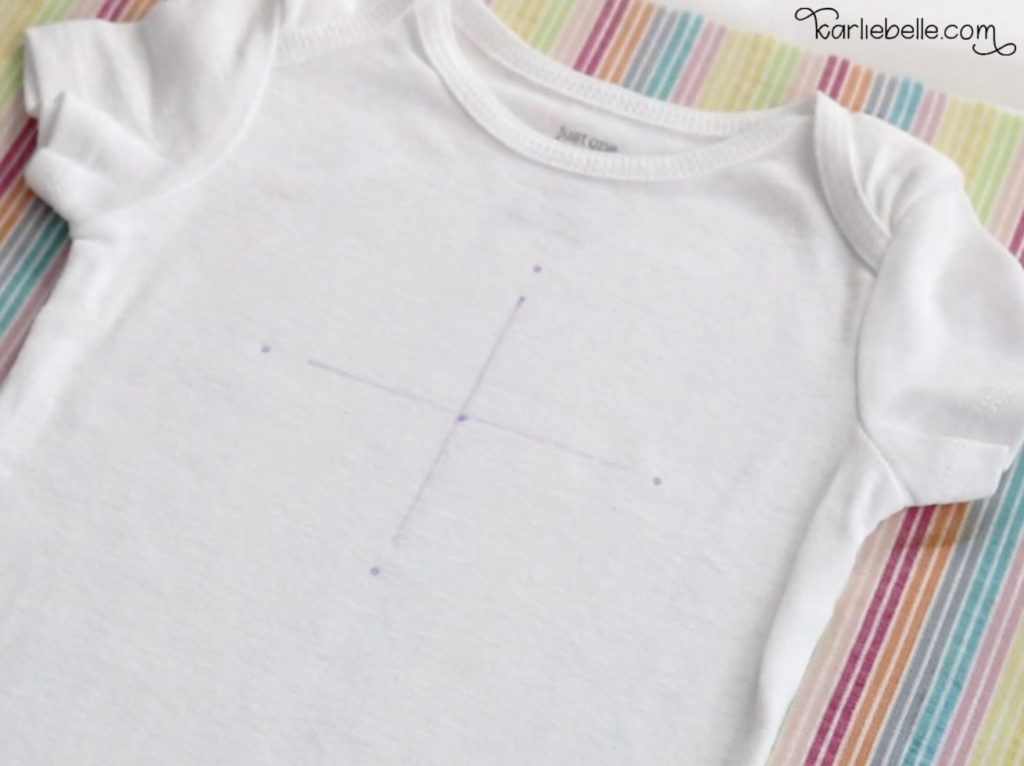
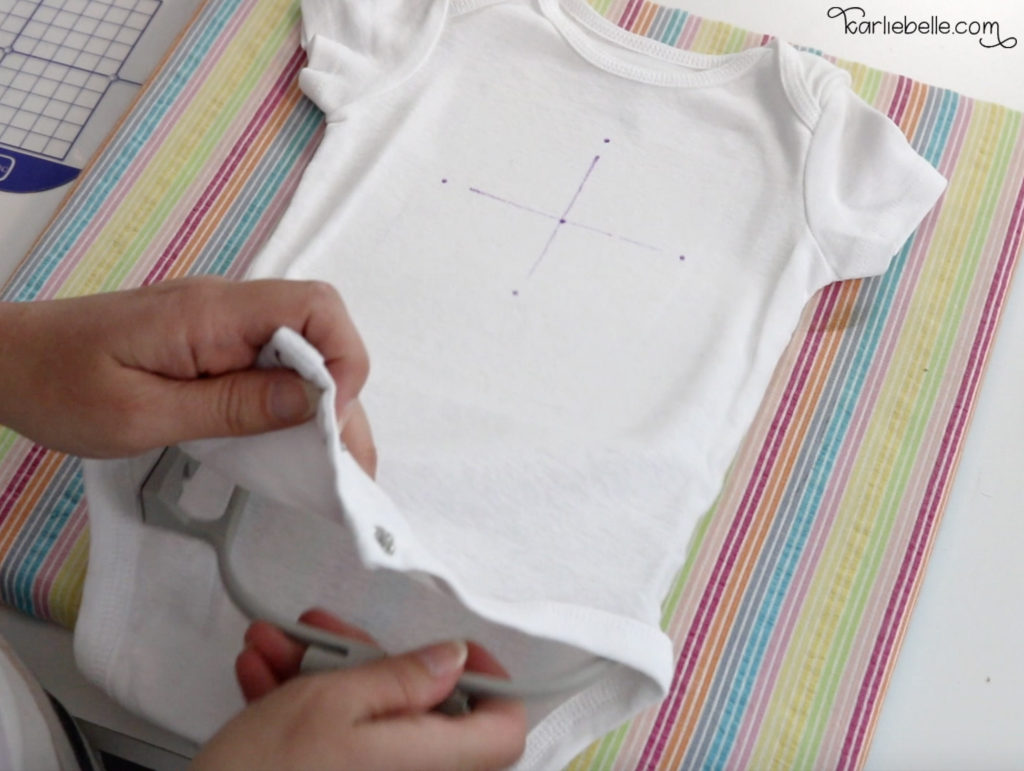
My secret recipe for placement for everything I embroidery is using the grid that comes with the hoop and a disappearing ink fabric marker. Just place the grid on the onesie and use a ruler to make sure its centered. I like to make the top of my grid be 1 inch down from the collar of the onesie.

Next, use the fabric marker to make dots in the little cut out holes in the grid. Remove the grid and use a ruler to draw crosshairs over the dots. Making these marks before trying to hoop really makes a world of a difference for things to be straight and centered.


Stabilizer
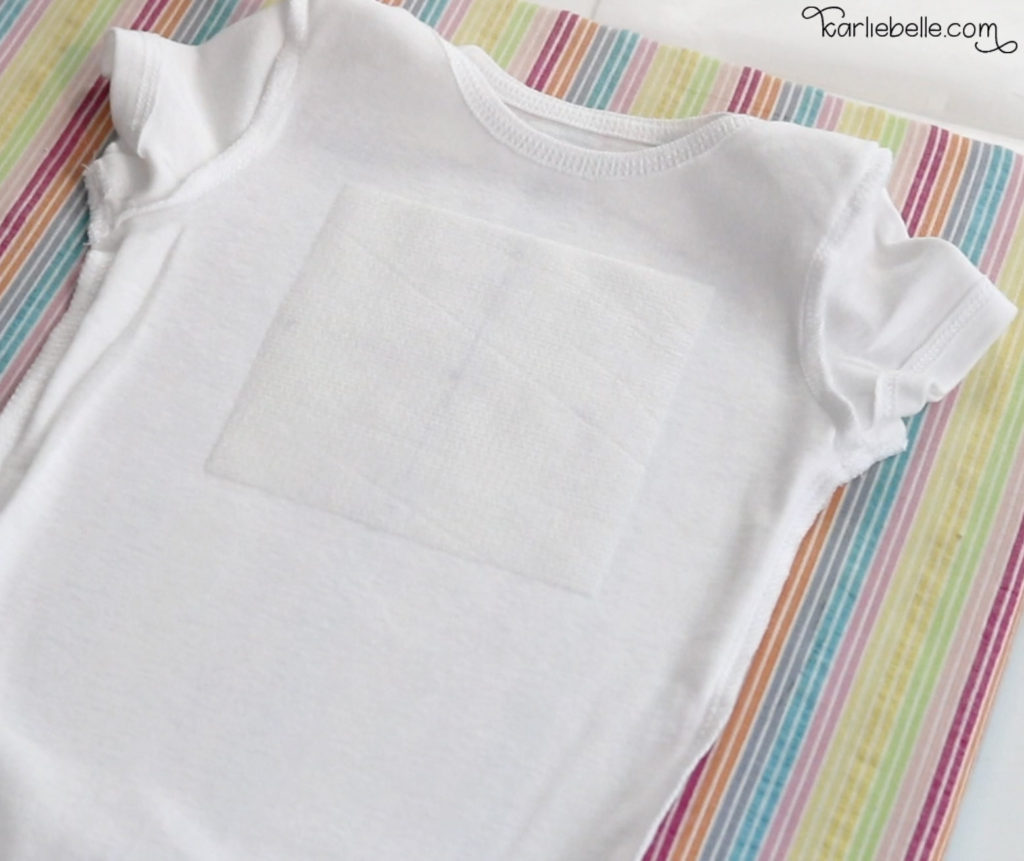
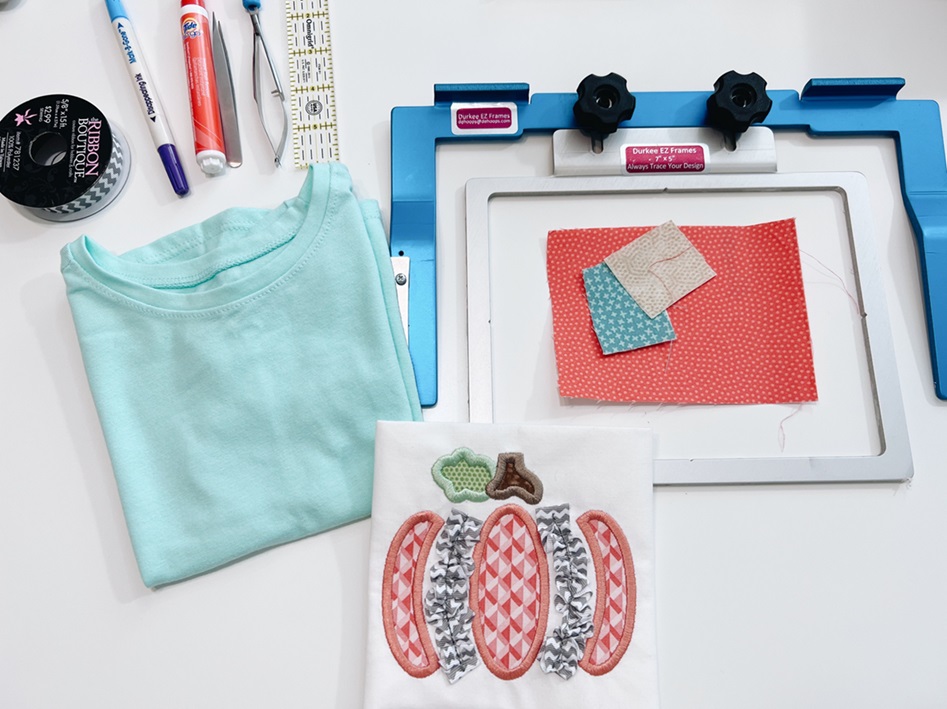
For all knit fabric that I embroider, I like to use a combination of poly mesh cut away stabilizer and tear away stabilizer. Depending on how thin the shirt or onesie is along with how dense the embroidery design is, you can use an extra layer of tear away for extra stability. Today I am using a Carter’s Onesie, which is thin, so I’m using two layers of tear away.
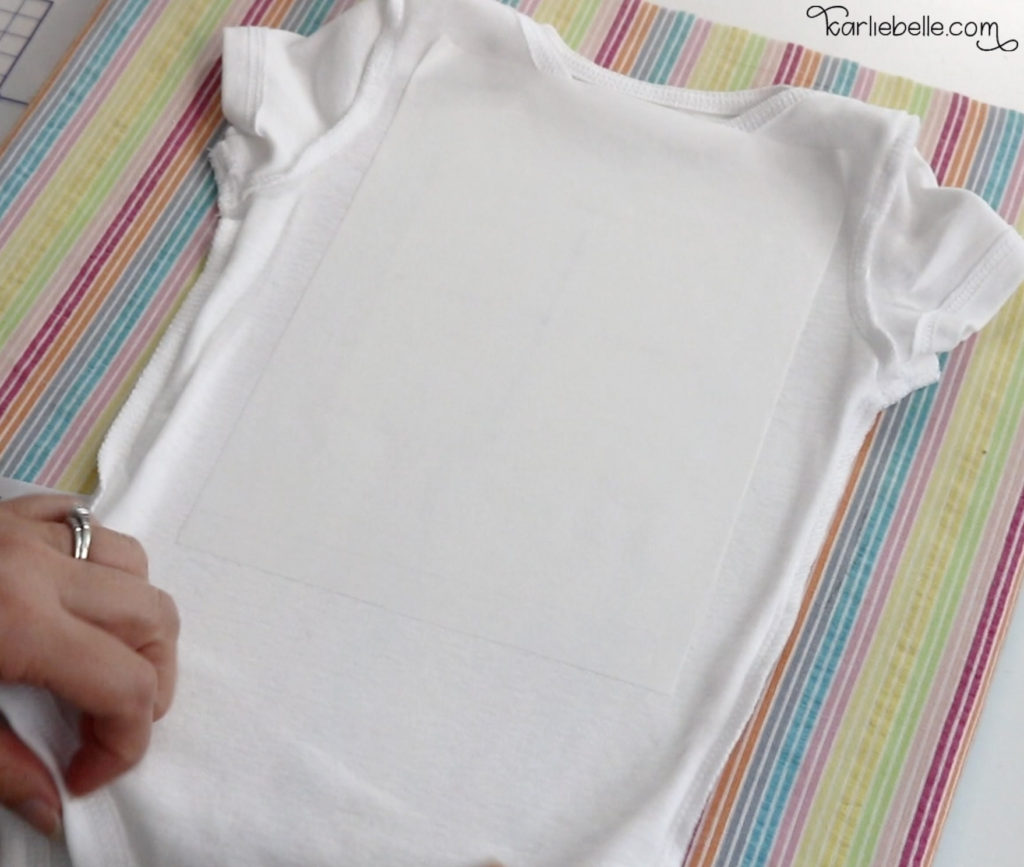
First I cute a piece of poly mesh that is just slightly larger than the sewing field of my hoop. Because I’m using a white onesie, it is easy to see my placement marks through the backside of the shirt. This allows me to easily iron the poly mesh in the correct place. Next I cut the tear away stabilizer to be larger than my overall hoop. Iron it in place so that the placement marks are in the center of the stabilizer. Repeat and add a second piece of tear away and iron in place.
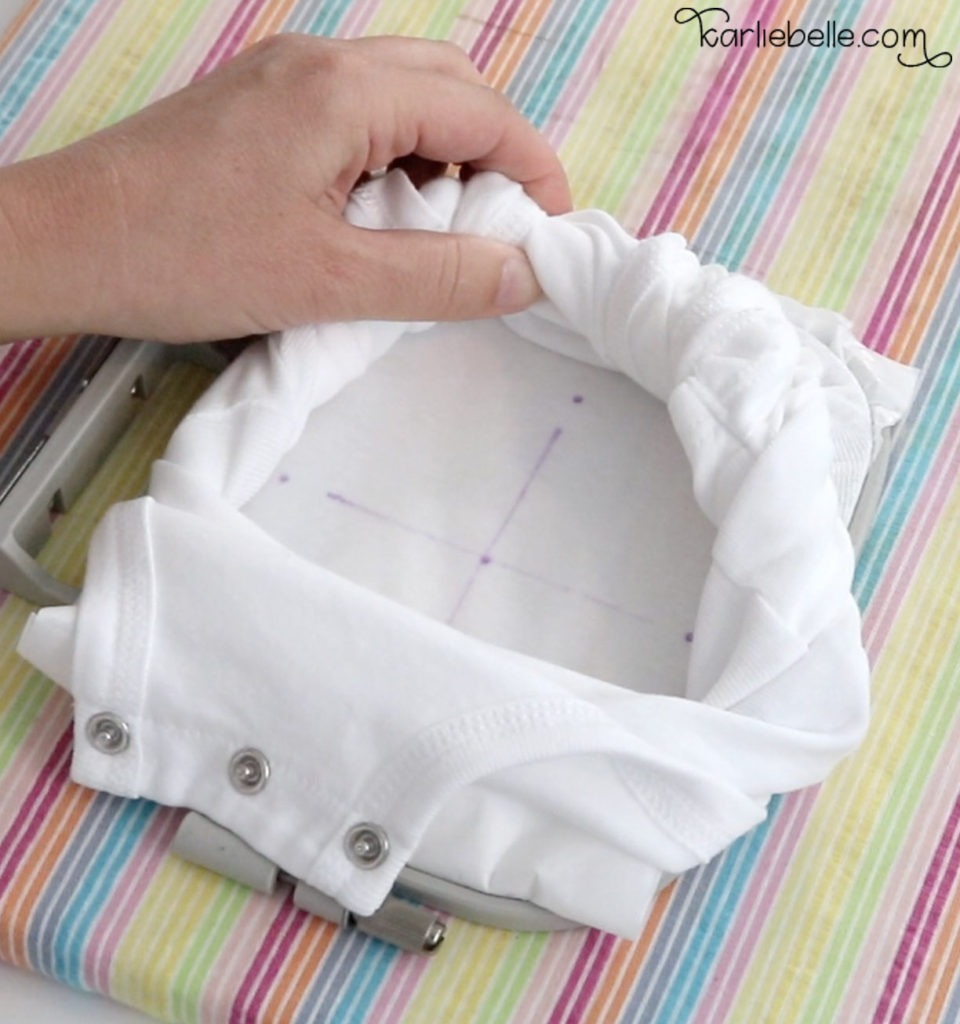
Hooping a Baby Onesie
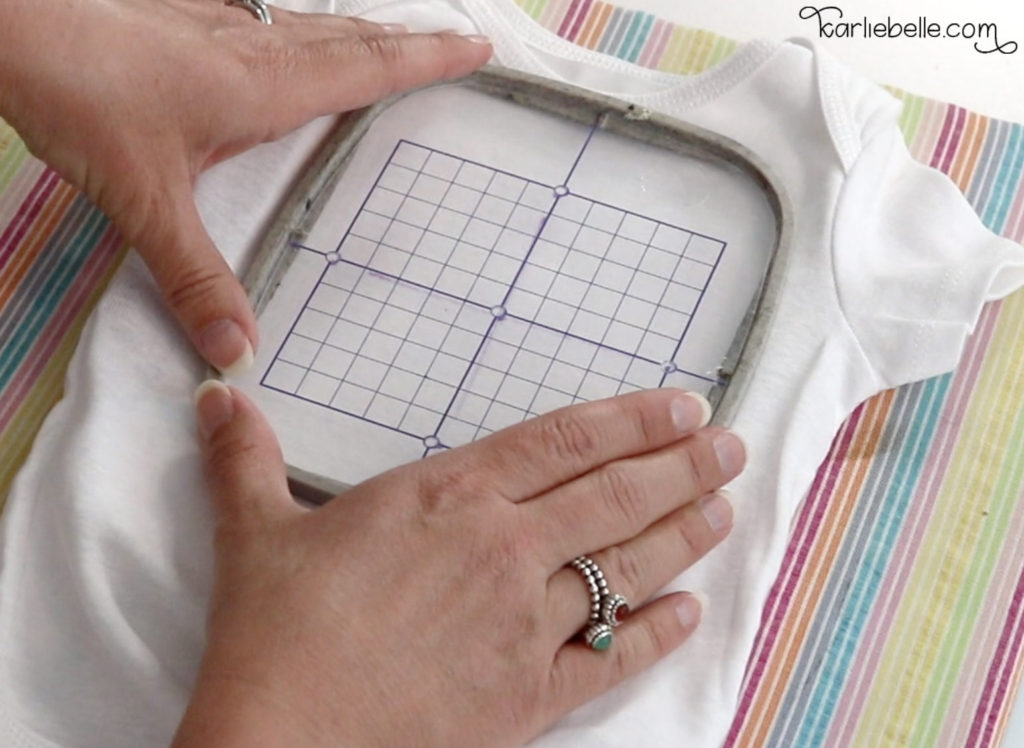
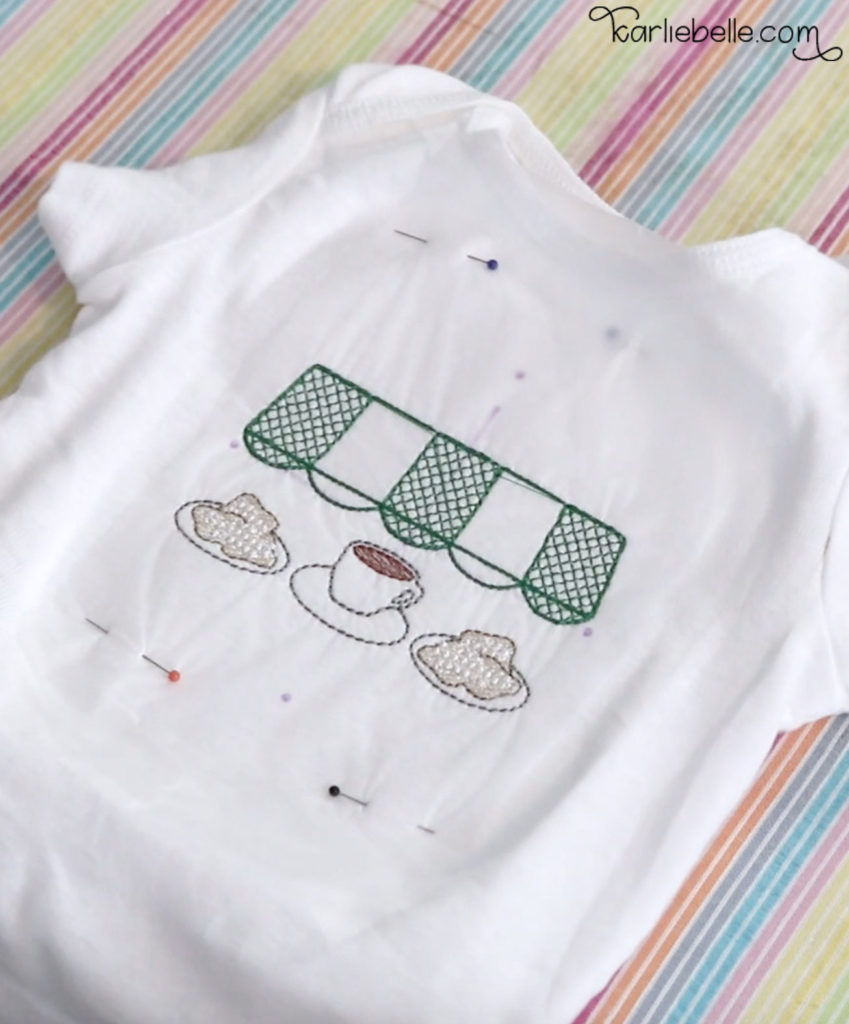
For newborn through 9 month onesies, I like to use a 4×4 hoop. For baby onesies larger than 9 months, I will use a 5×7 hoop. After your stabilizer is in place, its time to hoop. Turn the onesie right-side out. Next slide the outer part of the hoop inside the onesie. Snap the grid into the inner part of the hoop and use it as a guide to get right over your placement marks. Move the outer and inner hoop around until the lines on the grid line up with your placement marks then push down. If you have trouble pushing the inner hoop down completely then loosen the screw at the bottom of your hoop. Once the inner hoop is pushed down completely make sure the onesie fabric is tight in between the hoop and tighten the screw at the bottom.
For all of my projects, I like to add a topper to help prevent the threads from sinking down into the fabric. I use a water soluble topper that just disappears when it gets wet. Use pins to hold the topper in place. Make sure you place the pins outside of the sewing field so that the needle on your embroidery machine doesn’t hit them. You can also try spraying temporary adhesive to keep your topper in place.

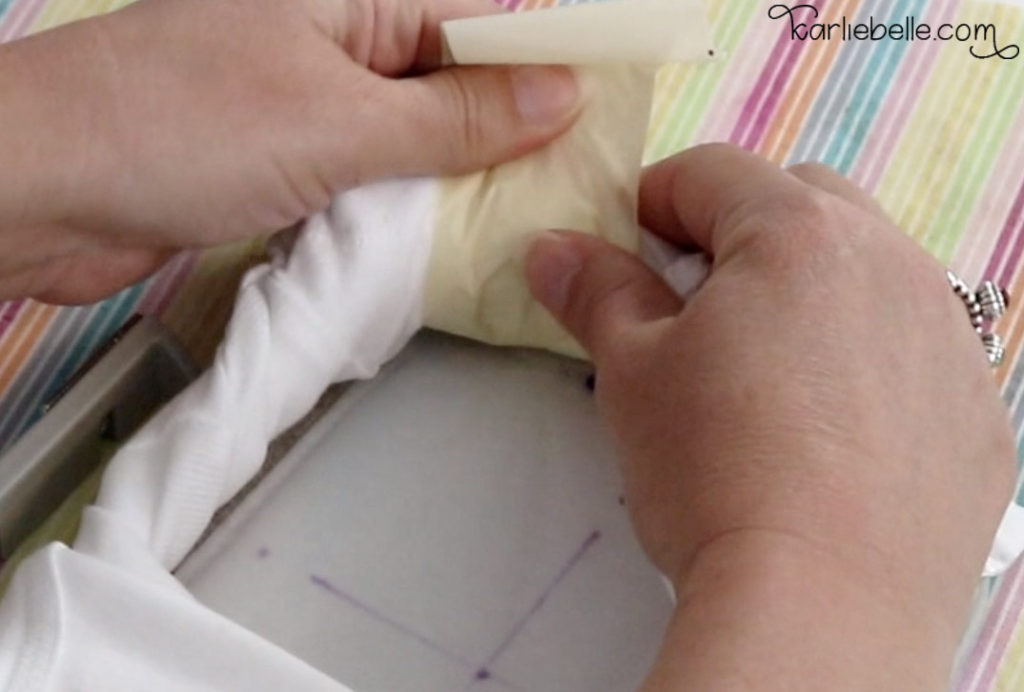
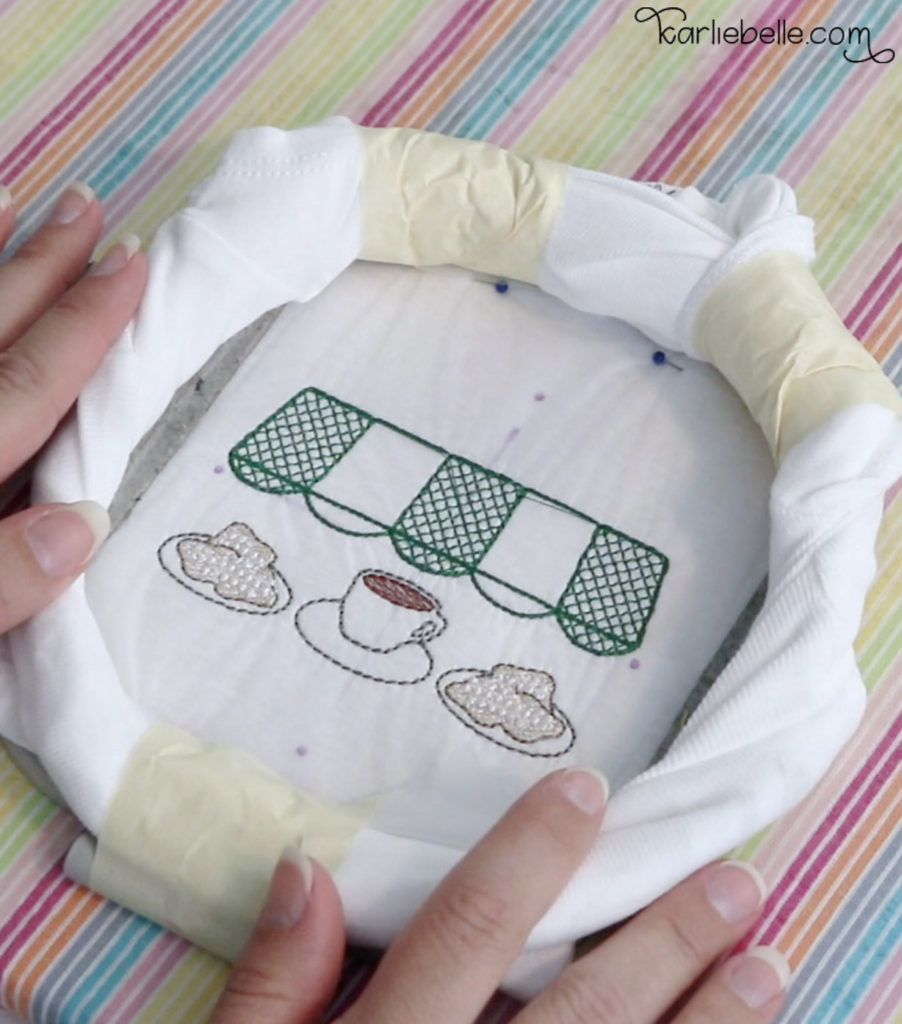
My Magic Trick
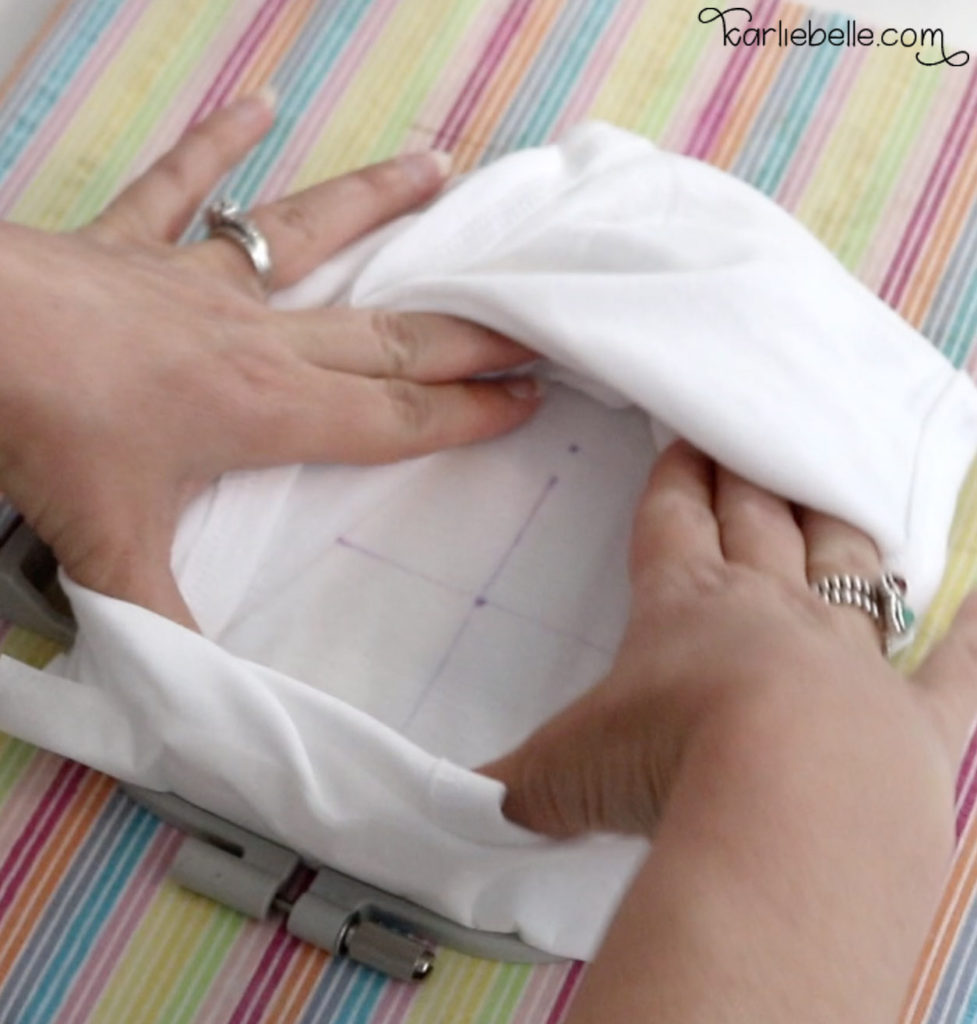
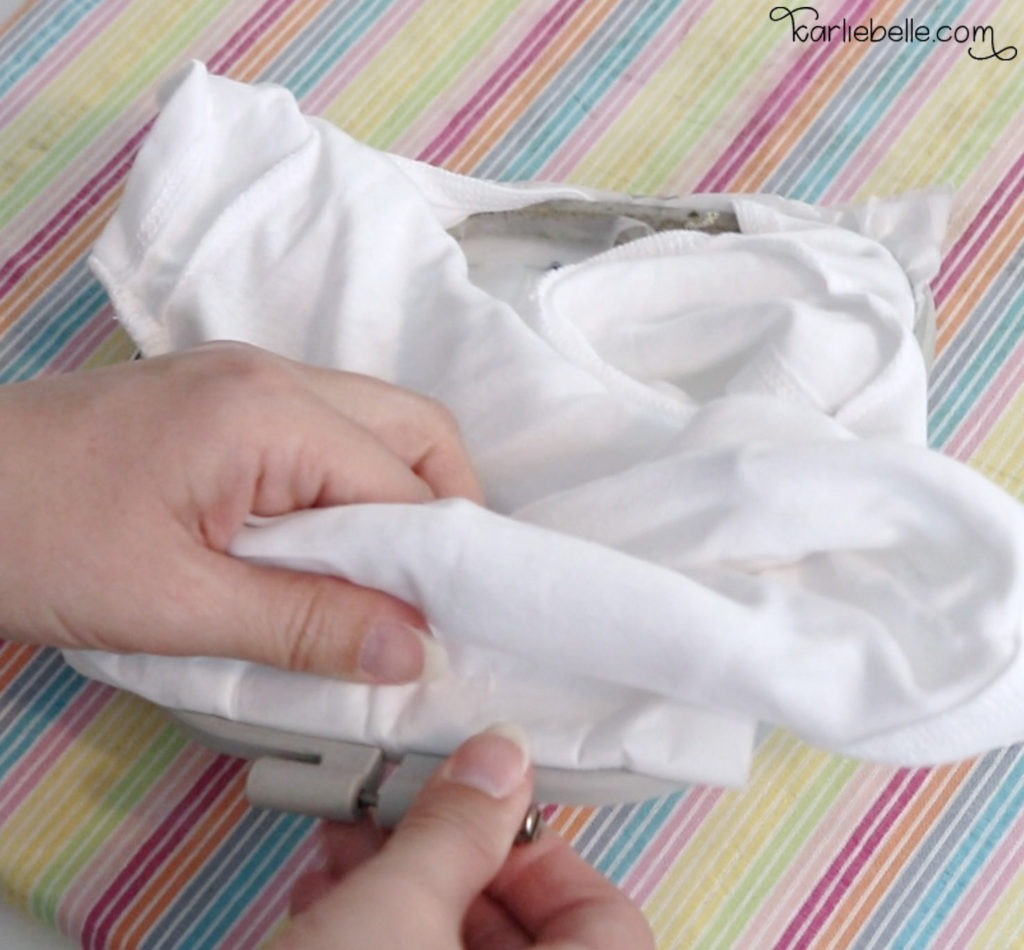
It may seem silly, but my magic trick to keeping fabric out of my way is masking tape! I just turn the onesie inside out after hooping and roll up the excess fabric and tape it out of my way. When taping, make sure you don’t tape any fabric on the back of your hoop. Also don’t let any tape be in your sewing field on the back. The adhesive from the tape might gum up your needle. Use as much tape as you need so that the sewing field is completely clear and your needle can now move around freely.
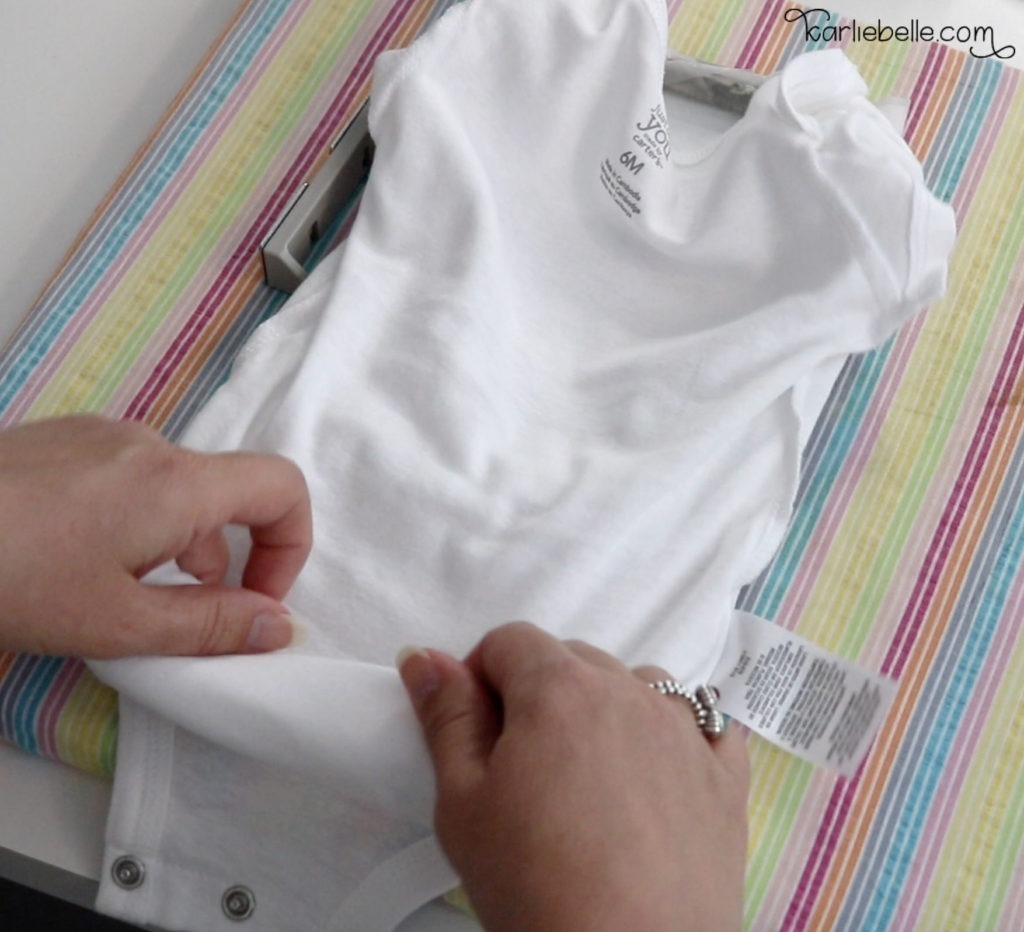
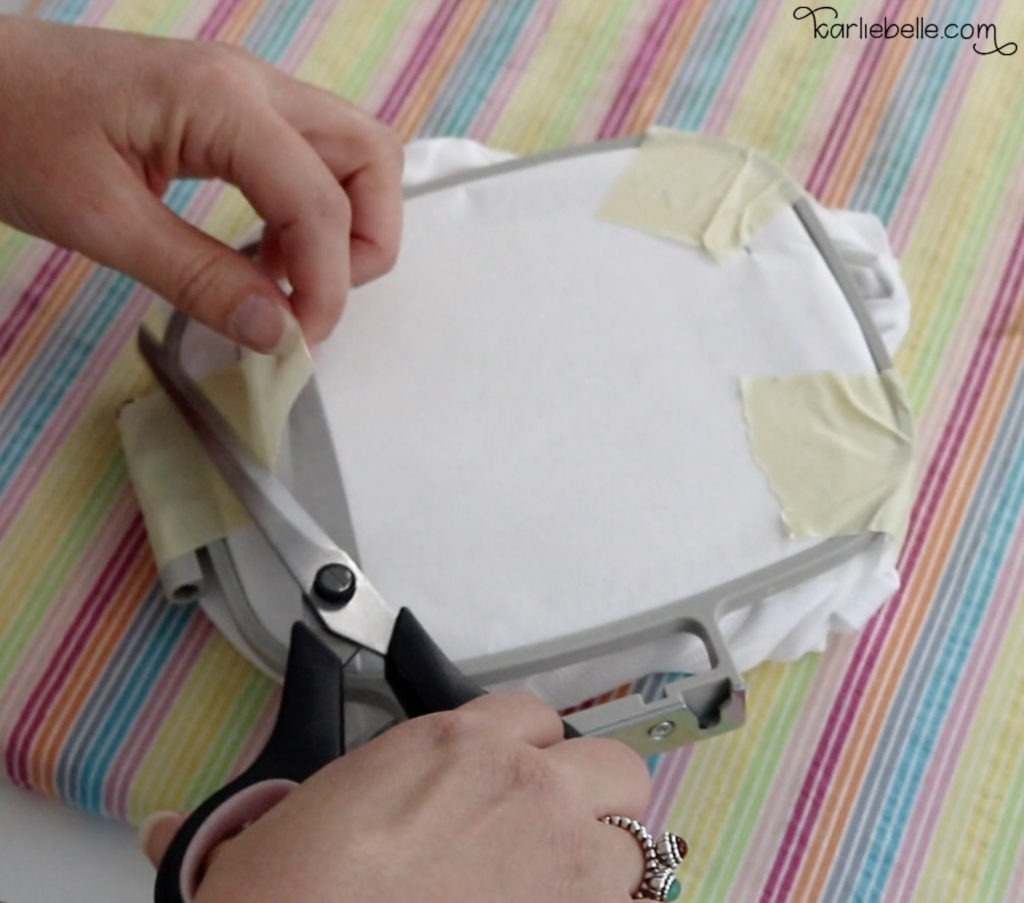
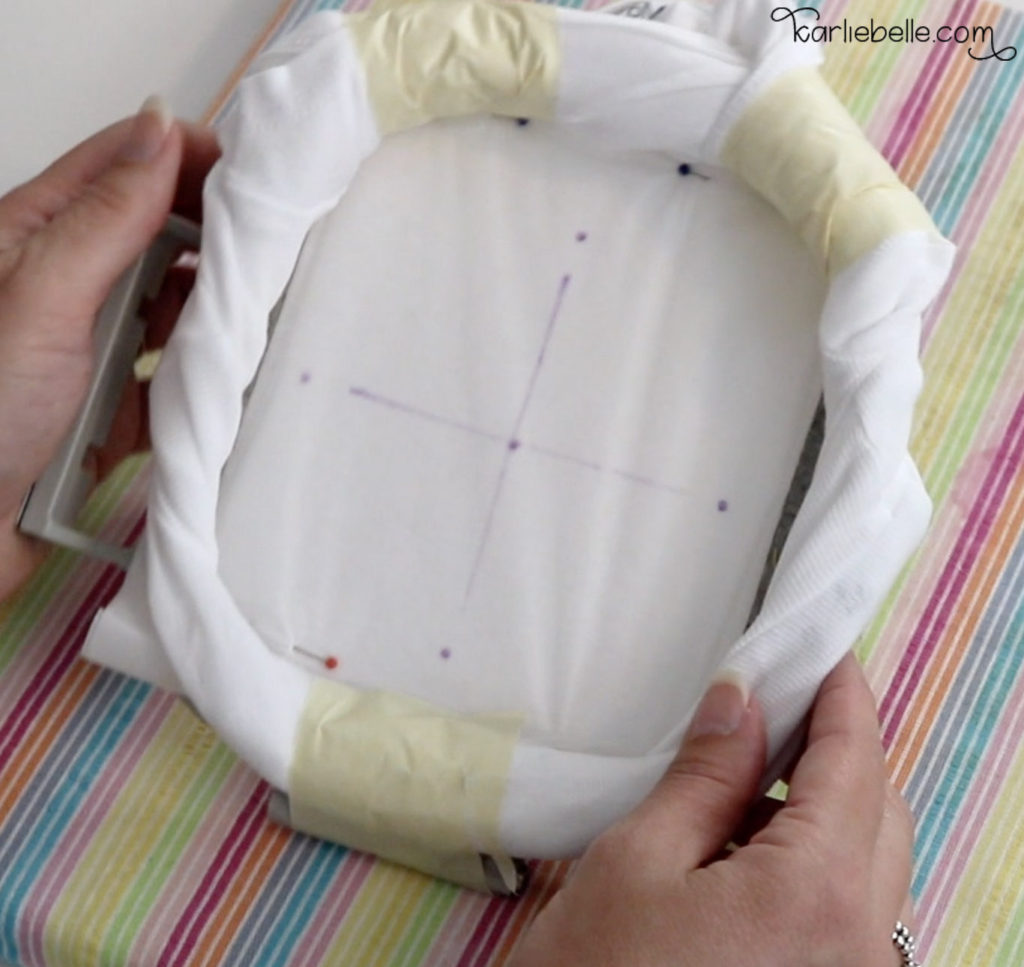
Things to keep in mind is that all the bulky fabric taped around the hoop now make it harder to actually clamp the hoop in place. Try sliding the hoop in from the back side of your needle and push the fabric down so your hoop can pass underneath it. Also watch when you are embroidering on the right side of your onesie, the right side of the presser foot may hit your fabric. Just pay attention and pull the fabric more to the right to keep this from happening.
Embroider a Baby Onesie
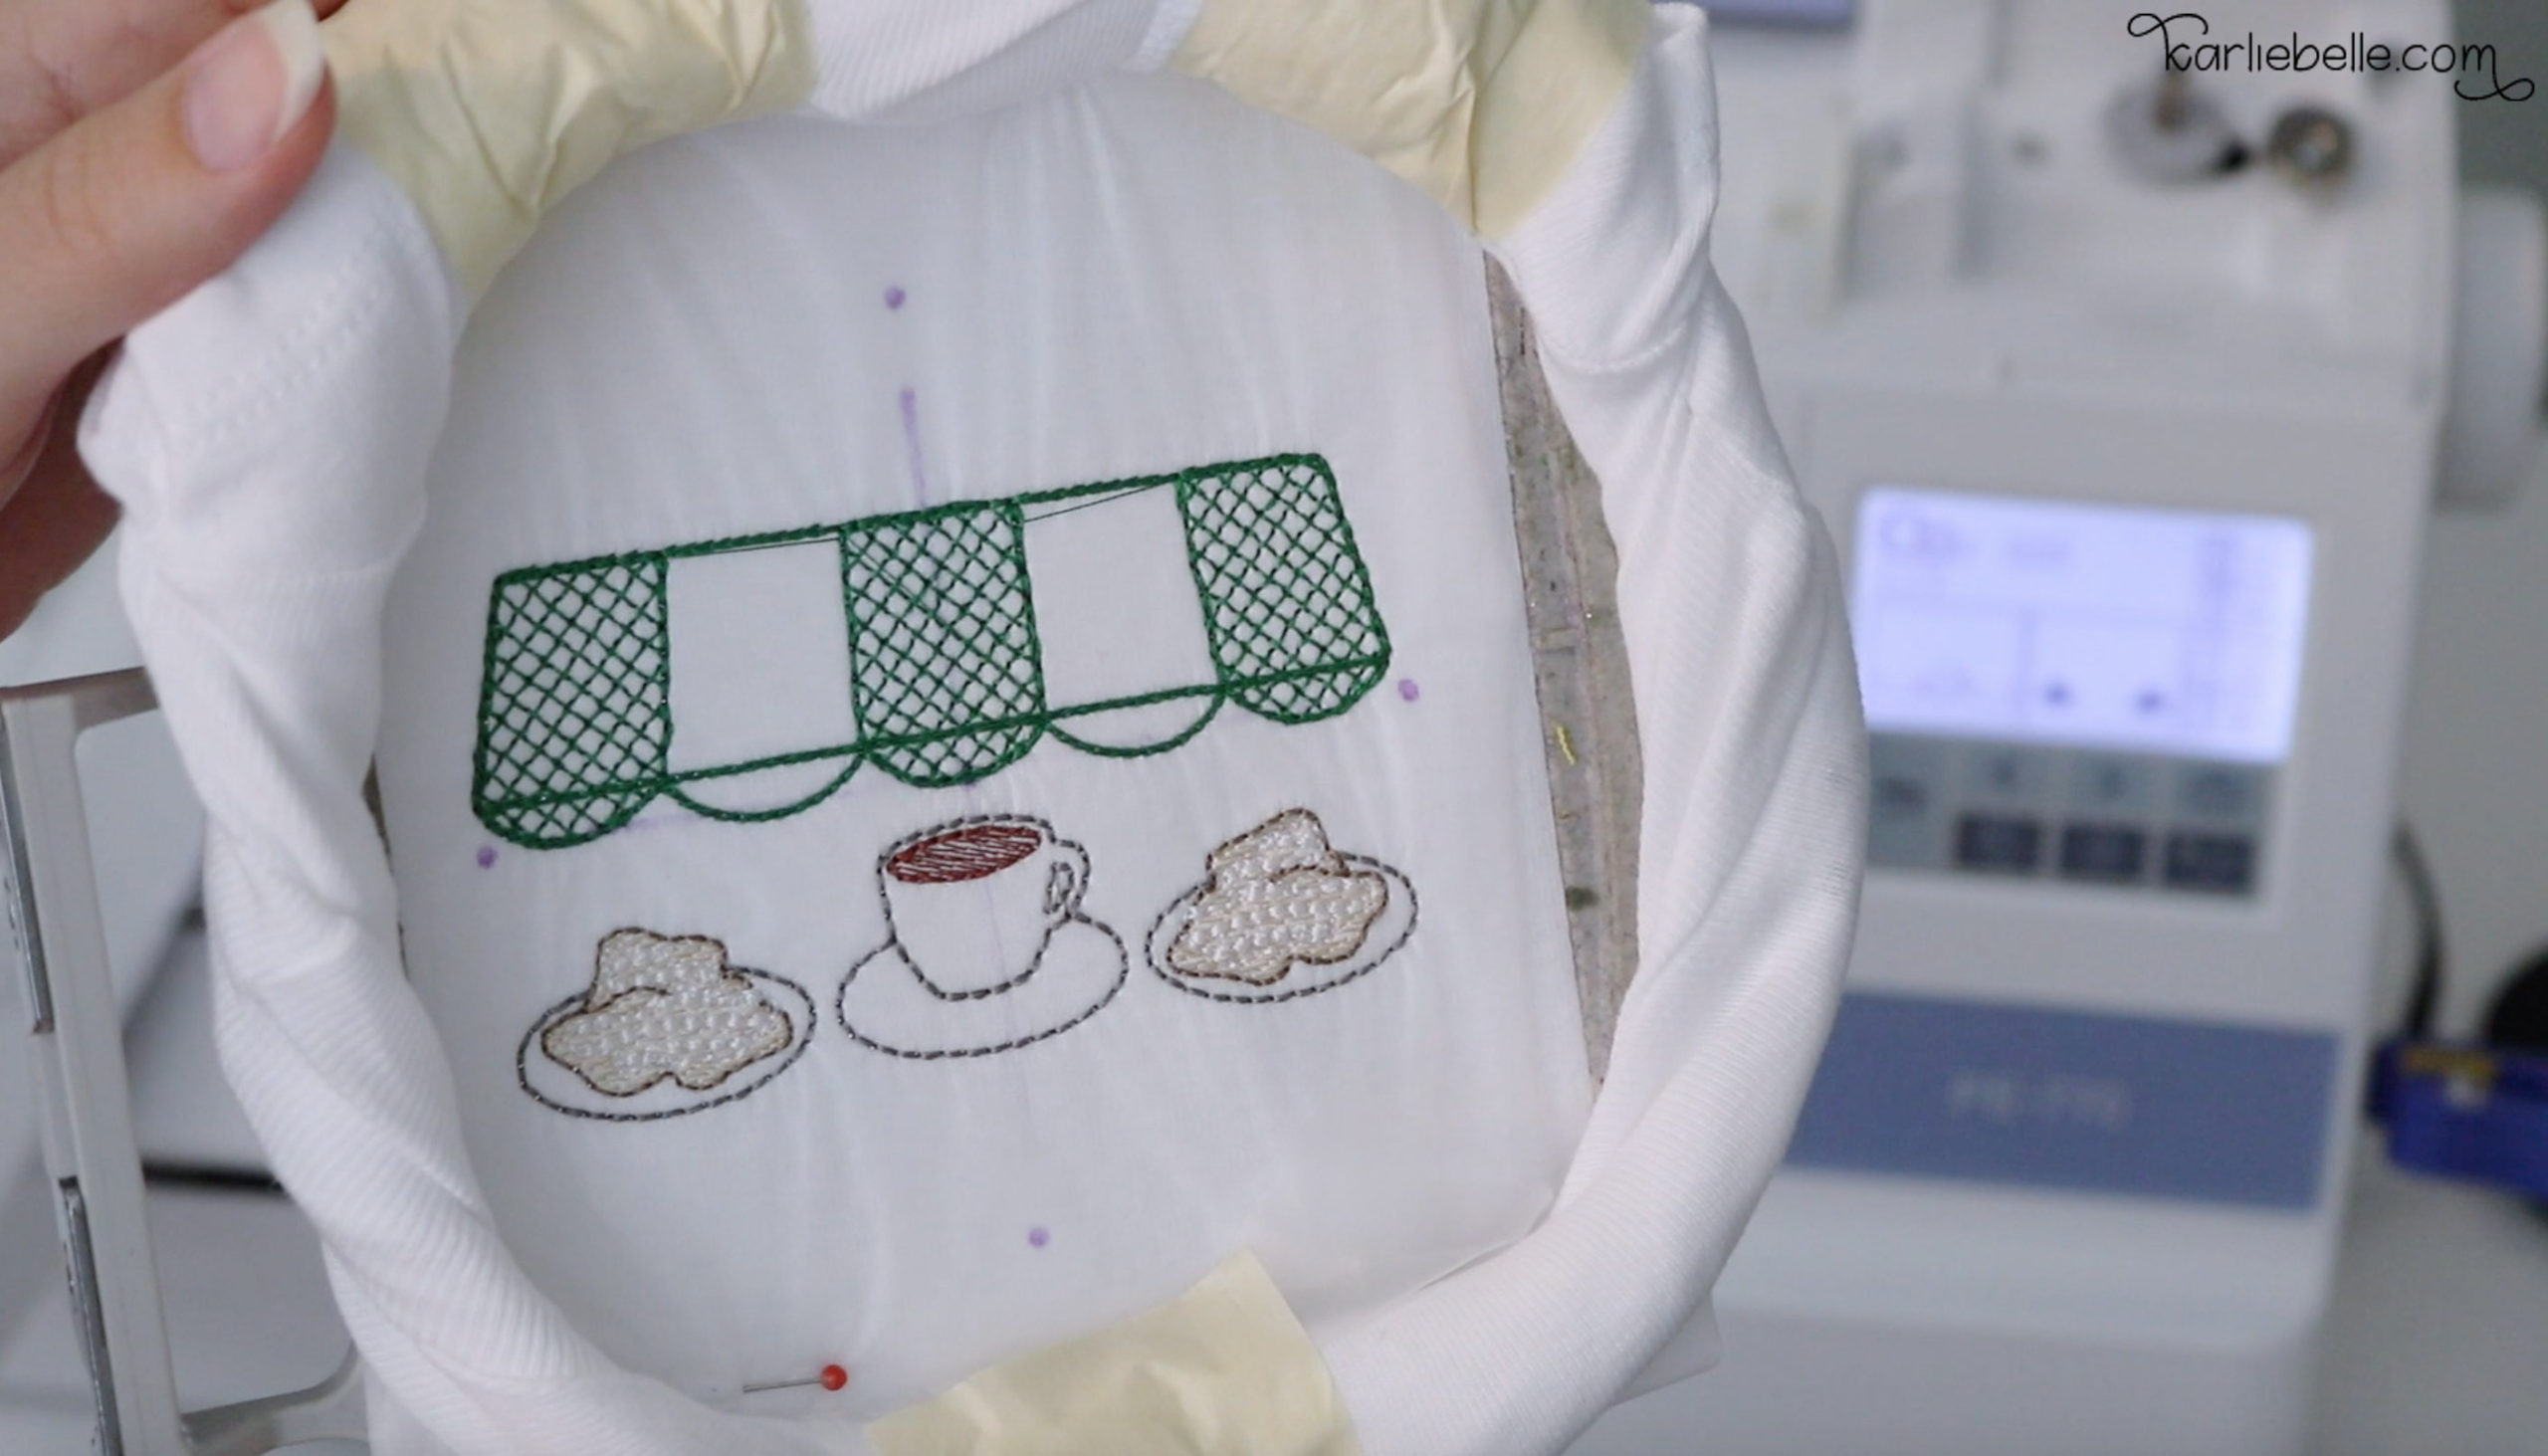
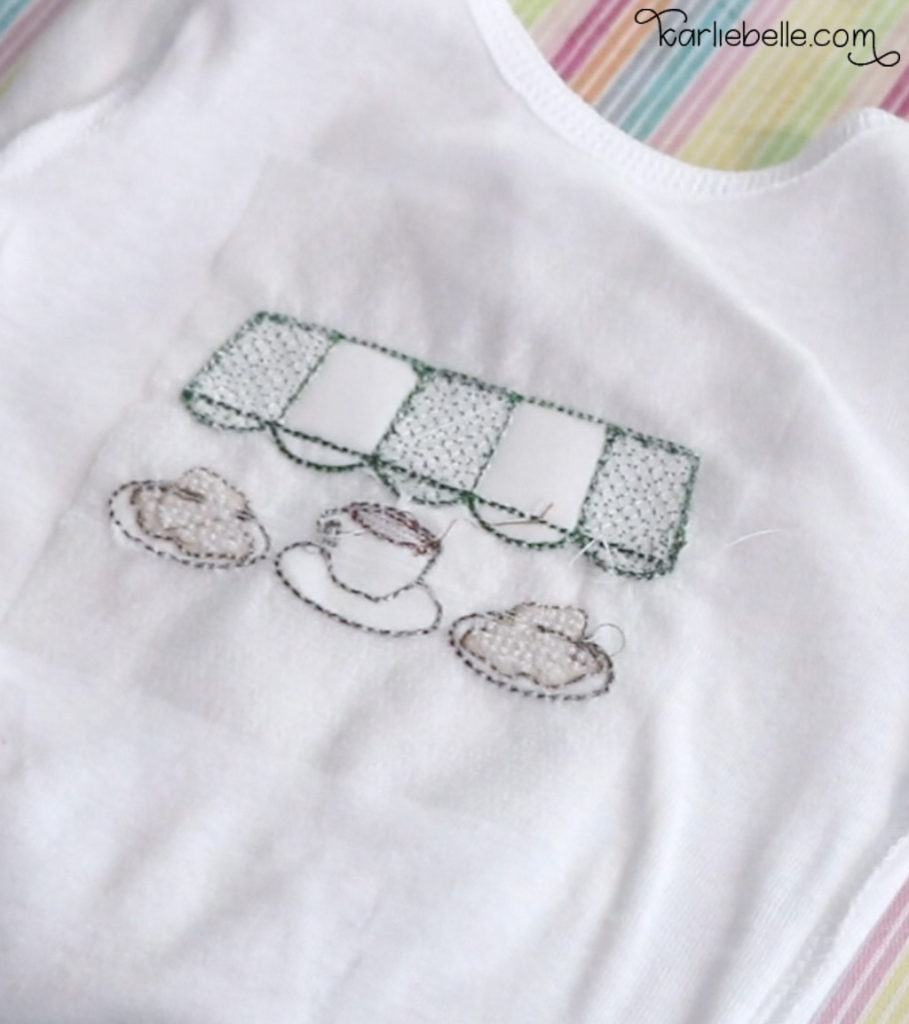
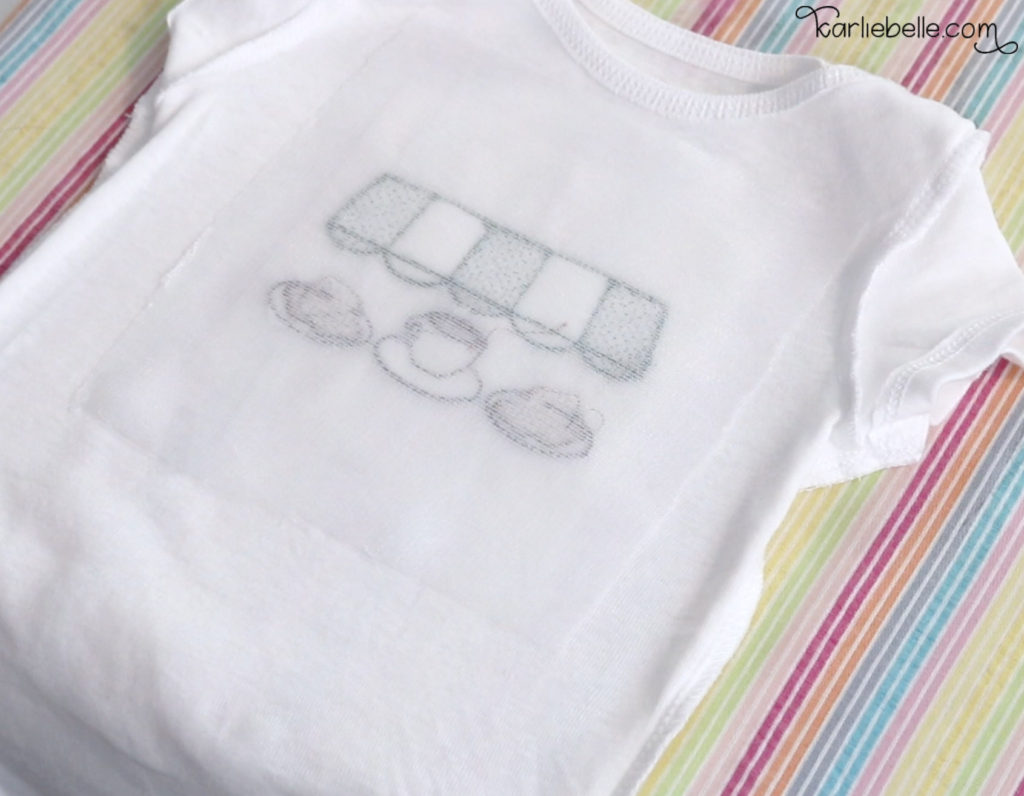
Today I am using an adorable Cafe du Monde inspired design from Joy Kate Designs. I open the design in Embrilliance Essentials (you can read more about why I love Embrilliance here) so that I can view the steps and if I wanted to add a name under the design I can also do that in Essentials. After reviewing all the steps I pick my thread colors and line them up in front of my machine in the order they are stitched.

Now all thats left is to stitch the design out and just change thread colors as needed. Here is an extra tip, pause the machine after you see jump stitches and cut them to help make clean up easier later.

Clean Up
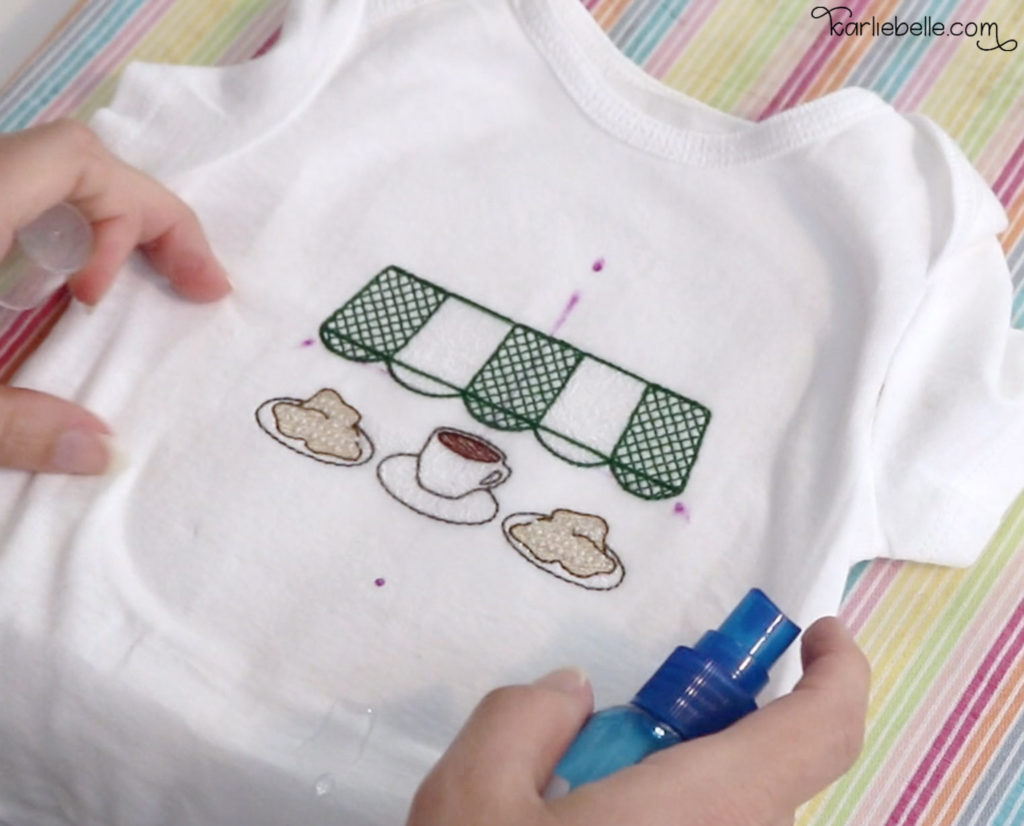
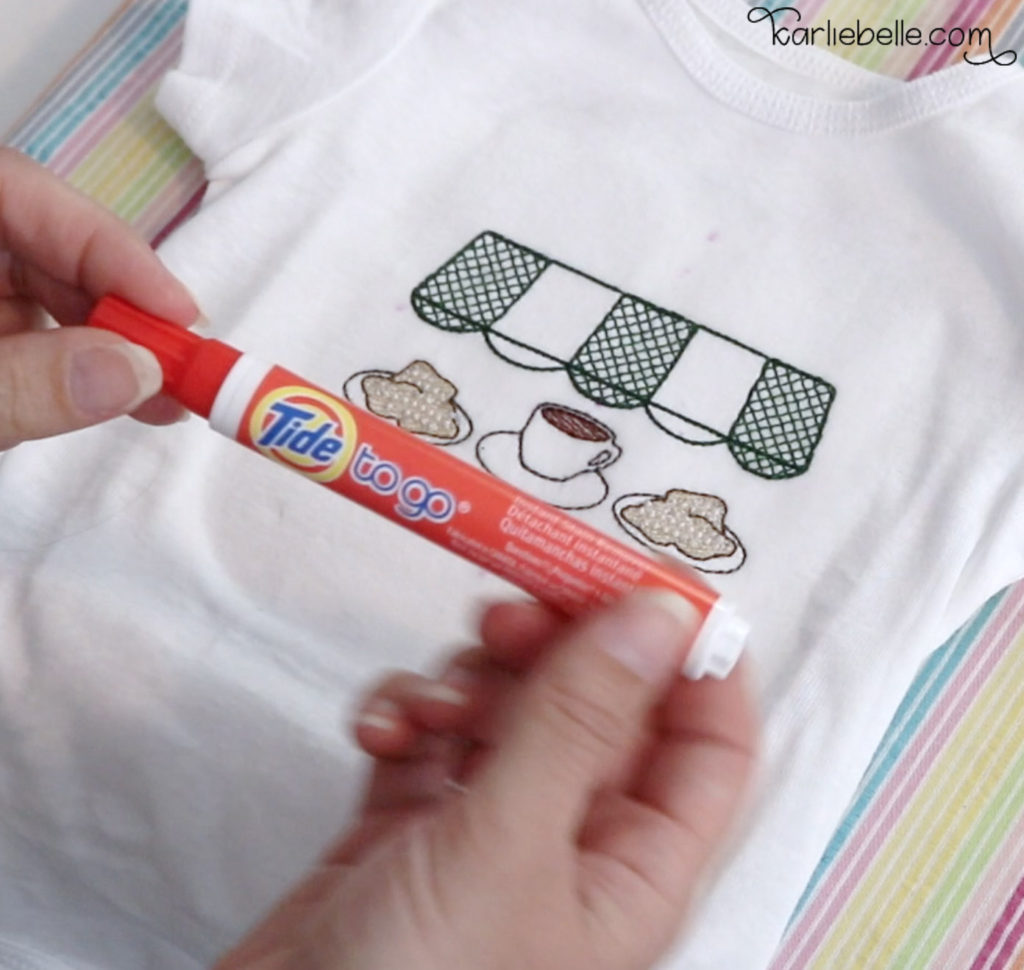
Once you are finished embroidering the baby onesie, remove it from the machine and remove the masking tape. Take the onesie out of the hoop and turn it right-side out. Cut any remaining jump stitches. Remove pins and tear away water soluble topper just like you would tear away stabilizer.
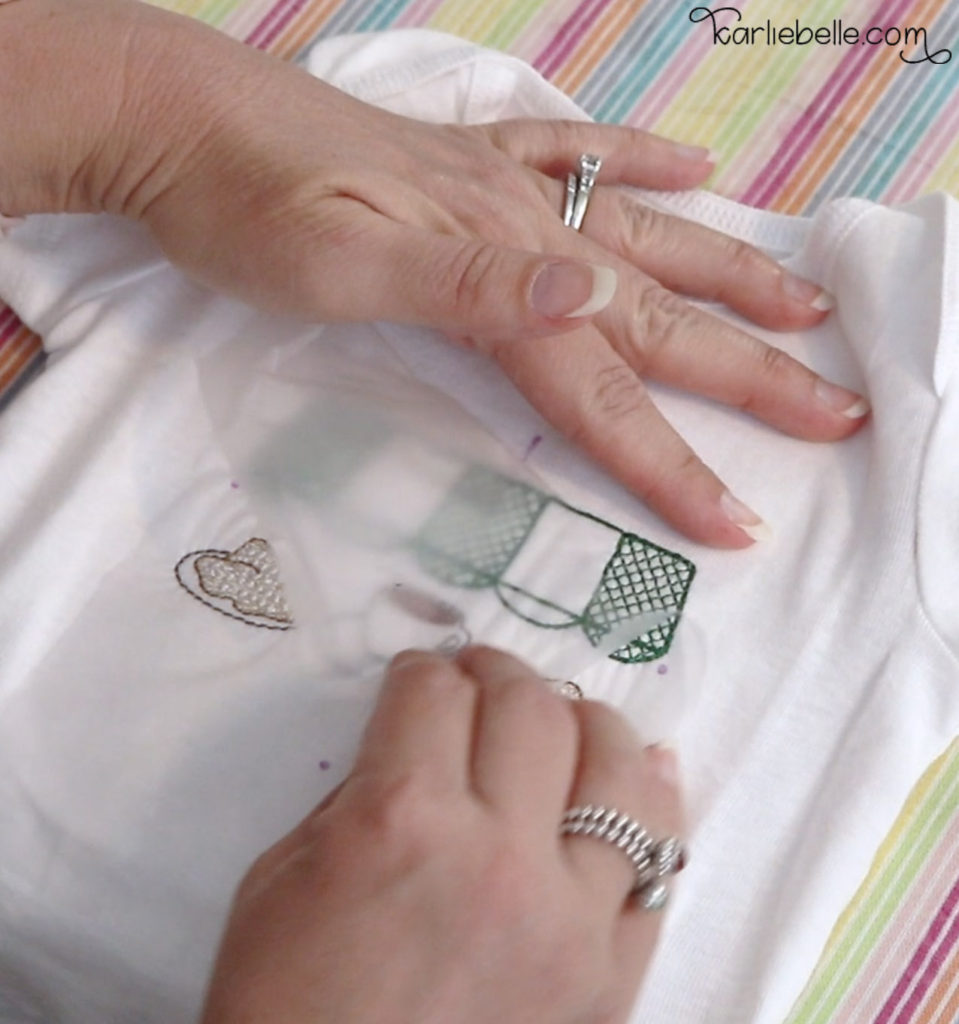
If topper still remains, spray some water on the design and use a towel to wipe away the topper. If placement marks remain, use a Tide Pen to remove it.
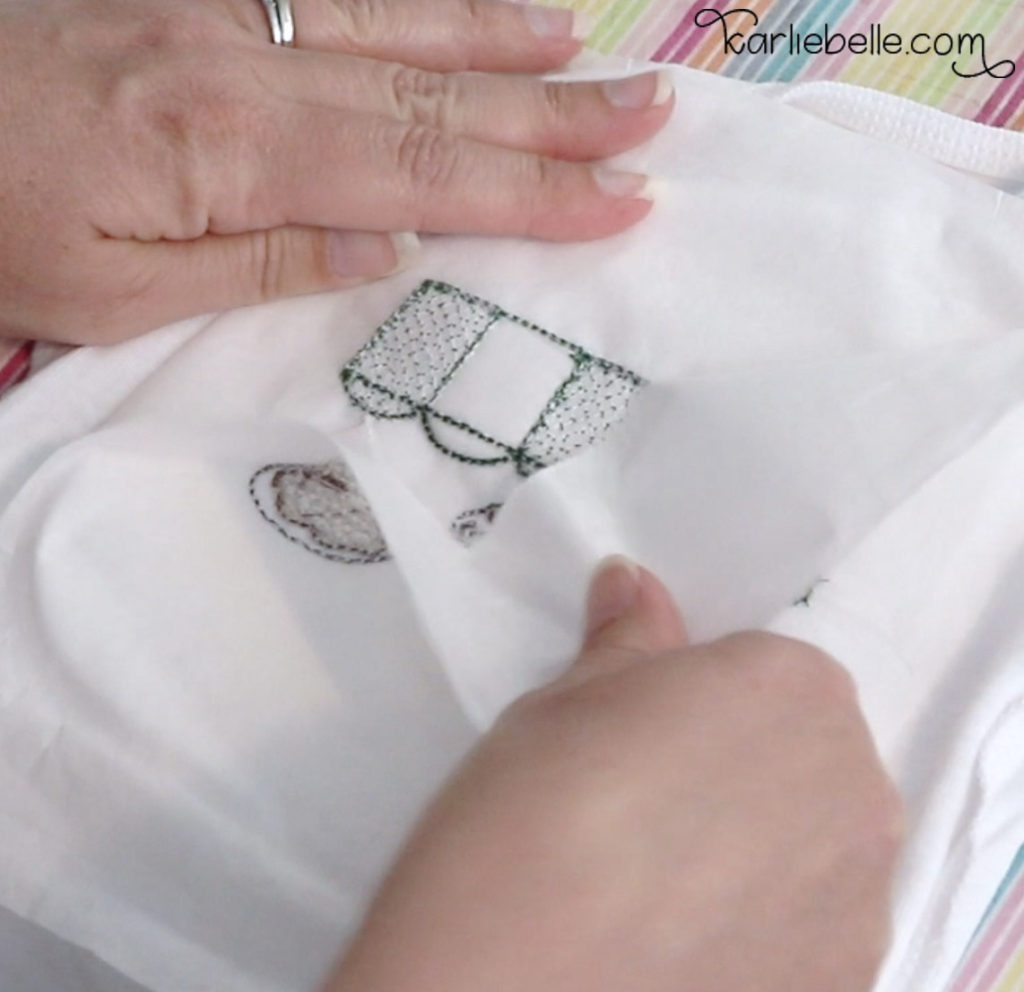
Turn the onesie inside out and tear away each layer of stabilizer. Clip any long dark thread but keep 1/4 inch to prevent the thread from coming undone. Iron the onesie to smooth it out before adding a fusible cover up to prevent threads from rubbing on baby’s skin.
Video Tutorial
In case you are more of a visual person, here is a link to my YouTube video showing you exactly how I hoop and embroider a baby onesie. Be sure to give the video a THUMBS UP if you like it and subscribe to my channel 🙂
Other Machine Embroidery posts you might like:
Brother PE800 Embroidery Machine Unboxing and Setup
Embrilliance Embroidery Software: The Best Program for Beginners
How to Get Started with Machine Embroidery: Supplies you will need
All About Stabilizers for Machine Embroidery
Hooping a Shirt for Machine Embroidery
Applique Tutorial from Start to Finish
How to Cut Applique Fabric using Silhouette Cameo
How to add a Name to a Baby Blanket
How to use 5×12 Multi-position Hoop
How I organize Fabric and Blank Clothing
My Favorite Places to Buy Embroidery Designs
How I Built my Sewing and Craft Desk (with mini craft room tour)


I hope you enjoyed todays tutorial and it helps you to conquer how to embroider a baby onesie! If you have any questions, please post them in the comments below. You can also always reach me by joining my Facebook Group for Beginner Machine Embroidery and Silhouette Crafts. Its a great group for posting questions and showing off your recent projects. I also do Facebook Live tutorials where you can ask me questions directly.
Thanks,

The post contains affiliate links and I will receive a small commission if you make a purchase after clicking on my link. All opinions are my own and I only promote products that I use and love.


Hi! I am new to embroidery and this was really helpful! Quick question – when you use pins, do you find that it loosens the stabilizer in the hoop? Every time I have tried to pin either the fabric or water soluble stabilizer, when I puncture the tear away stabilizer it seems to make the stabilizer not as tight in the hoop. Just wondering if I am doing something wrong! Thanks!
Hi Caroline! I don’t find I have any trouble with pining things, but I have heard from others in my Facebook group that they also have trouble. Another options is to use masking tape to hold your water soluble topper in place 🙂
Love the onesie instructions, I wish I had a young one to make it for. My problem isn’t a onesie, I still can’t get placement right on a collard golf shirt. Do you have something I have missed or will you have tutorial coming?
Thank you,
Barb Frantz
[email protected]
Thanks Barb! Check out this Sip & Stitch tutorial where I embroidered a golf shirt for my husband and you can see how I figure out placement. https://karliebelle.com/sip-stitch-no-84-embroidered-logo-on-polo-shirt-using-mighty-hoops-system-and-ricoma-em1010/
I absolutely loved this tutorial! The step-by-step instructions were so helpful, and the tips on choosing the right thread color made a big difference. I can’t wait to try embroidering a onesie for my niece. Thanks, Karlie Belle!
This tutorial is so helpful! I love the idea of personalizing a onesie for my baby. The step-by-step instructions make it seem easy. Can’t wait to try it out and add some charm to my little one’s wardrobe! Thank you, Karlie Belle!
Thank you for the detailed guide on embroidering a baby onesie, Karlie! Your tips and photos make it look so easy and fun. I can’t wait to try this for my little one—such a cute way to personalize their wardrobe! ❤️
I like to embroider the onesie. My nex project is tis. Thanks a lot